Beginners Guide: Difference between revisions
Tag: Undo |
(First edit failed, rolled it back. Now I have properly added information to Basic Combat and an overview of Combat Skills.) |
||
| Line 40: | Line 40: | ||
== Basic combat == | == Basic combat == | ||
{{Main|Reference=Combat}} | {{Main|Reference=Combat}} | ||
To fight [[monsters]] navigate to the [[combat]] page by selecting any combat skill from the left menu. The combat page contains a map of Melvor displaying all the available locations where [[monsters]] can be fought. Selecting "Switch Map / List View" will display all the locations on the map in list form, allowing you to easily select your preferred [[combat area]], [[slayer area]], or [[dungeon]]. Selecting an area will display the enemies which can be found there, along with their Hitpoints, Combat Level, and Attack Type. Highlighting an enemy will display their [[Monster Loot Tables|possible loot drops]] and selecting an enemy will begin [[combat]]. When [[combat]] begins you will not be able to browse the map and location list until you run or die. Enemies are fought automatically, however any items enemies drop upon death must be looted manually by selecting "Loot All" or the item itself. | |||
Combat skills are levelled by damaging enemies with weapons, and magic. To train a specific combat skill match your Attack Style icon with the relevant combat skill. Most combat skills have a passive effect even when the relevant style is not selected. Weapons, armour, and [[Cooking#Cooking_Items|food]] can be equipped for use by selecting them in the [[Bank]]. Weapons and armour provide various bonuses and penalties to your combat stats, while food can be used for healing in combat. Upon death a random piece of [[Equipment]] worn will be lost forever, however unique items lost this way like [[Equipment#Capes|Skillcapes]] can be repurchased at the [[Shop]]. | |||
== Combat Skills == | |||
===== Attack ===== | |||
[[Attack]] increases your accuracy rating with [[Equipment#Melee_6|melee weapons]] which affects your chance to hit. Higher tiers of [[Equipment#Melee_6|melee]], and [[Equipment#Magic_5|magic weapons]], require higher [[Attack]] to be equipped. | |||
===== Strength ===== | |||
[[Strength]] increases your Max Hit with [[Equipment#Melee_6|melee weapons]]. Max Hit determines your maximum potential damage on a successful hit. | |||
===== Defence ===== | |||
[[Defence]] increases your Melee and Ranged Evasion Rating, which decreases the likelihood you will be hit by melee and ranged attacks. Higher tiers of some [[Equipment#Melee_2|armours]] require higher [[Defence]] to be equipped. | |||
===== Hitpoints ===== | |||
[[Hitpoints]] affect your maximum life total and your passive regeneration rate. After receiving damage you will heal slowly over time, the speed at which your heal is based on your [[Hitpoints]] level. In addition to passive regeneration, your hitpoints can be replenished by consuming any food you have equipped. [[Hitpoints]] experience is earned by damaging enemies with any weapon. | |||
===== Ranged ===== | |||
[[Ranged]] increases your Accuracy Rating and Max Hit with [[Equipment#Ranged_6|ranged weapons]], which affects your chance to hit and damage respectively. Higher tiers of [[Equipment#Ranged_6|ranged weapons]] and some [[Equipment#Ranged_2|armours]] require higher [[Ranged]] to be equipped. | |||
===== Magic ===== | |||
[[Magic]] allows you to cast [[Magic#Spells|Spells]] from your Spellbook provided you have the required [[Runecrafting#Runes|Runes]] in your [[Bank]] and a [[Equipment#Magic_5|magic weapon]] equipped. [[Magic]] increases your Accuracy Rating with [[Magic#Spells|Spells]], which increases your chance to hit while using them. [[Magic]] also increases your Magic Evasion Rating, which decreases the likelihood you will be hit by magic wielding enemies. Higher tiers of [[Equipment#Magic_5|magic weapons]], and some [[Equipment#Magic_2|armours]] require higher [[Magic]] to be equipped. | |||
===== Prayer ===== | |||
[[Prayer|Prayers]] are [[Prayer#Prayers|passive bonuses]] that expend Prayer Points to remain in effect. You gain Prayer Points by burying [[Prayer#Bones|Bones]], which are dropped by [[Monsters]] upon death. [[Prayer]] experience is earned by damaging enemies and is further increased by having [[Prayer#Prayers|prayers]] active at the time damage is dealt. | |||
===== Slayer ===== | |||
[[Slayer]] experience is earned by killing enemies in [[slayer area|slayer areas]] or by completing Slayer Tasks. Slayer Tasks also earn you Slayer Coins which are used to purchase [[Shop#Slayer|Slayer Equipment]] from the [[Shop]]. [[slayer area|Slayer areas]] are unlocked by raising your [[Slayer]] level. | |||
== Early game goal == | == Early game goal == | ||
Revision as of 09:20, 29 February 2020
Melvor Idle is an idle game and as such much of the time spent playing you can be away from the game. However, the game does have some interaction and on this page we will try to teach you the basic interactions.
Before we get started it is recommended that you set up an account with Melvor Cloud. This provides some basic backups for save files.
The interface
The interface is split in three sections.
The bar on the left side of the screen is a menu filled with a list of buttons. There are buttons for every skill, a couple of information pages, your Bank, and a Settings page. Please take note of the fact that you can scroll in this window.
The top bar
In the top bar you can see what page you are currently on. You can also see if you are currently logged into Melvor Cloud on the top right. If you see a letter c in a green oblong you are logged in. If the oblong is red, you are not logged in. You can find a login button in the Settings window or by clicking on your user name in the top right.
The main section
The main section of the screen can be filled with a plethora of content. It can be filled with the Bank, Settings, a Skill, or one of the information pages.
The bank
The Bank is where your items are stored. Weapons and armour can be equipped in a menu opened by clicking on the item in the bank. Bank slots can be bought in the shop. You can sell your items with the menu opened by clicking on the item in your inventory.
The shop
The shop is where you can spent your hard earned gp. Here you can buy things like better pickaxes and axes, more bank slots, a couple of ingredients for various skills and a bit more.
Basic skilling
One of the main aspects of the game is gathering resources with the various gathering skills and then processing those resources into more refined products with the various other skills.
One of the most simple production lines is with Fishing and Cooking. To begin one should click on the fishing button in the menu on he left which opens the fishing skill. To then start fishing you have to click on the area in which you want to fish. At fishing level 1 you only have access to Area One, so I would suggest clicking on that.
Now that you have started fishing the fishing window has changed slightly. First of all near the top of the window you will see that the experience bar slowly makes its way across the window indicating that you are gaining experience. Secondly the selected area is shown in blue indicating that you are fishing. In the menu on the left you will also notice that Fishing is now shown in green indicating that this skill is active. And finally, near the top right you will be able to see what your last three caught fishes are.
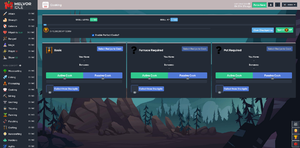
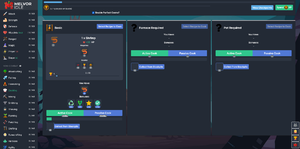
Now that you have caught some fish it is time to cook them. This is done with the cooking skill. When you have opened the cooking window you will notice three columns. The first thing you should do is in the left column select what fish you want to cook. Then in the right column you should light a fire, and finally in the middle column you should select how many you want to cook. Please note that you need logs gathered with the Woodcutting skill in order to light a cooking fire. The cook 50 and cook all buttons will unlock when you have achieved a higher mastery with the specific food item you are trying to cook.
Basic combat
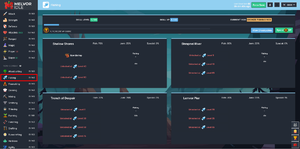
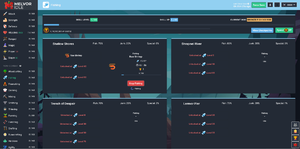
To fight monsters navigate to the combat page by selecting any combat skill from the left menu. The combat page contains a map of Melvor displaying all the available locations where monsters can be fought. Selecting "Switch Map / List View" will display all the locations on the map in list form, allowing you to easily select your preferred combat area, slayer area, or dungeon. Selecting an area will display the enemies which can be found there, along with their Hitpoints, Combat Level, and Attack Type. Highlighting an enemy will display their possible loot drops and selecting an enemy will begin combat. When combat begins you will not be able to browse the map and location list until you run or die. Enemies are fought automatically, however any items enemies drop upon death must be looted manually by selecting "Loot All" or the item itself.
Combat skills are levelled by damaging enemies with weapons, and magic. To train a specific combat skill match your Attack Style icon with the relevant combat skill. Most combat skills have a passive effect even when the relevant style is not selected. Weapons, armour, and food can be equipped for use by selecting them in the Bank. Weapons and armour provide various bonuses and penalties to your combat stats, while food can be used for healing in combat. Upon death a random piece of Equipment worn will be lost forever, however unique items lost this way like Skillcapes can be repurchased at the Shop.
Combat Skills
Attack
Attack increases your accuracy rating with melee weapons which affects your chance to hit. Higher tiers of melee, and magic weapons, require higher Attack to be equipped.
Strength
Strength increases your Max Hit with melee weapons. Max Hit determines your maximum potential damage on a successful hit.
Defence
Defence increases your Melee and Ranged Evasion Rating, which decreases the likelihood you will be hit by melee and ranged attacks. Higher tiers of some armours require higher Defence to be equipped.
Hitpoints
Hitpoints affect your maximum life total and your passive regeneration rate. After receiving damage you will heal slowly over time, the speed at which your heal is based on your Hitpoints level. In addition to passive regeneration, your hitpoints can be replenished by consuming any food you have equipped. Hitpoints experience is earned by damaging enemies with any weapon.
Ranged
Ranged increases your Accuracy Rating and Max Hit with ranged weapons, which affects your chance to hit and damage respectively. Higher tiers of ranged weapons and some armours require higher Ranged to be equipped.
Magic
Magic allows you to cast Spells from your Spellbook provided you have the required Runes in your Bank and a magic weapon equipped. Magic increases your Accuracy Rating with Spells, which increases your chance to hit while using them. Magic also increases your Magic Evasion Rating, which decreases the likelihood you will be hit by magic wielding enemies. Higher tiers of magic weapons, and some armours require higher Magic to be equipped.
Prayer
Prayers are passive bonuses that expend Prayer Points to remain in effect. You gain Prayer Points by burying Bones, which are dropped by Monsters upon death. Prayer experience is earned by damaging enemies and is further increased by having prayers active at the time damage is dealt.
Slayer
Slayer experience is earned by killing enemies in slayer areas or by completing Slayer Tasks. Slayer Tasks also earn you Slayer Coins which are used to purchase Slayer Equipment from the Shop. Slayer areas are unlocked by raising your Slayer level.
Early game goal
A good early game goal to keep in mind is to prepare yourself for combat. So you will need armour, weapons and food.
| Melvor Idle version v1.3.1 (Released: 30th October 2024) |
|---|
Error creating thumbnail: File missing Combat: Error creating thumbnail: File missing Attack • Error creating thumbnail: File missing Strength • Error creating thumbnail: File missing Defence • Error creating thumbnail: File missing Hitpoints • Error creating thumbnail: File missing Ranged • Error creating thumbnail: File missing Magic • Error creating thumbnail: File missing Prayer • Error creating thumbnail: File missing Slayer • Error creating thumbnail: File missing Corruption
|
| Skills: Error creating thumbnail: File missing Farming • Error creating thumbnail: File missing Township • Error creating thumbnail: File missing Woodcutting • Error creating thumbnail: File missing Fishing • Error creating thumbnail: File missing Firemaking • Error creating thumbnail: File missing Cooking • Error creating thumbnail: File missing Mining • Error creating thumbnail: File missing Smithing • Error creating thumbnail: File missing Thieving • Error creating thumbnail: File missing Fletching • Error creating thumbnail: File missing Crafting • Error creating thumbnail: File missing Runecrafting • Error creating thumbnail: File missing Herblore • Error creating thumbnail: File missing Agility • Error creating thumbnail: File missing Summoning • Error creating thumbnail: File missing Astrology • Error creating thumbnail: File missing Alternative Magic • Error creating thumbnail: File missing Cartography • Error creating thumbnail: File missing Archaeology • Error creating thumbnail: File missing Harvesting
|
| Other: Error creating thumbnail: File missing Beginners Guide • Error creating thumbnail: File missing Bank • Error creating thumbnail: File missing Combat • Error creating thumbnail: File missing Mastery • Error creating thumbnail: File missing Money Making • Error creating thumbnail: File missing Shop • Error creating thumbnail: File missing Golbin Raid • Error creating thumbnail: File missing Full Version • Error creating thumbnail: File missing Into the Abyss
|
| Reference Tables: Items, Equipment, Experience Table, Upgrading Items, Combat Areas, Slayer Areas, Dungeons, Strongholds, The Abyss, Monsters |


